SpringBoot启动过程源码分析
随着SpringBoot的热度越来越高,现在企业中对SpringBoot的使用也越来越频繁,而SpringBoot也没让我们失望,它极大的提高了编程的快捷性,今天就SpringBoot(1.5.8.RELEASE)启动源码来看看SpringBoot是如何避繁就简的吧。
启动入口 SpringBoot为我们提供了一个简单快捷的启动方式,当我们需要更多功能时,只需要通过在DemoApplication 类上增加相应的注解即可:
1
2
3
4
5
6
7
8
import org.springframework.boot.SpringApplication;import org.springframework.boot.autoconfigure.SpringBootApplication;@SpringBootApplication public class DemoApplication { public static void main (String[] args) { SpringApplication.run(DemoApplication.class, args); } }
此处简单描述一下@SpringBootApplication注解:
此注解注解在Spring Boot的XXXApplication类(有main函数,程序启动的入口)上,其结合了三个注解: @Configuration, @EnableAutoConfiguration 和 @ComponentScan。
@Configuration :
@Configuration 中所有带 @Bean 注解的方法都会被动态代理,因此调用该方法返回的都是同一个实例。
@EnableAutoConfiguration :
使用该注解后,Spring Boot将尝试根据项目引入的依赖来配置程序 。
@ComponentScan :
指定要扫描的包,以及扫描的条件,默认扫描@ComponentScan注解所在类的同级类和同级目录下的所有类。
另外官方具有很详细的说明,请查阅:https://docs.spring.io/spring-framework/docs/4.3.5.RELEASE/javadoc-api/org/springframework/context/annotation/
SpringApplication.run方法 通过跟读代码发现,SpringApplication.run方法主要分为两个步骤,new SpringApplication(sources),run:
1 2 3 4 5 6 7 8 9 10 public static ConfigurableApplicationContext run (Object[] sources, String[] args) { return new SpringApplication (sources).run(args); }
new SpringApplication(sources) 首先看看new SpringApplication(sources)方法
通过调试发现,该方法的核心就是initialize,其源码如下:
1
2
3
4
5
6
7
8
9
10
11
12
private void initialize (Object[] sources) { if (sources != null && sources.length > 0 ) { this .sources.addAll(Arrays.asList(sources)); } this .webEnvironment = deduceWebEnvironment(); setInitializers((Collection) getSpringFactoriesInstances( ApplicationContextInitializer.class)); setListeners((Collection) getSpringFactoriesInstances(ApplicationListener.class)); this .mainApplicationClass = deduceMainApplicationClass(); }
其中比较疑惑的是deduceWebEnvironment方法,因为WEB_ENVIRONMENT_CLASSES的值是不变的,所以该方法返回值恒为true。
setListeners方法主要是将getSpringFactoriesInstances返回的实例加入到listeners集合中。
getSpringFactoriesInstances源码如下:
1
2
3
4
5
6
7
8
9
10
11
12
13
private <T> Collection<? extends T > getSpringFactoriesInstances(Class<T> type, Class<?>[] parameterTypes, Object... args) { ClassLoader classLoader = Thread.currentThread().getContextClassLoader(); Set<String> names = new LinkedHashSet <String>( SpringFactoriesLoader.loadFactoryNames(type, classLoader)); List<T> instances = createSpringFactoriesInstances(type, parameterTypes, classLoader, args, names); AnnotationAwareOrderComparator.sort(instances); return instances; }
SpringFactoriesLoader.loadFactoryNames源码如下:
1
2
3
4
5
6
7
8
9
10
11
12
13
14
15
16
17
18
19
public static List<String> loadFactoryNames (Class<?> factoryClass, ClassLoader classLoader) { String factoryClassName = factoryClass.getName(); try { Enumeration<URL> urls = (classLoader != null ? classLoader.getResources(FACTORIES_RESOURCE_LOCATION) : ClassLoader.getSystemResources(FACTORIES_RESOURCE_LOCATION)); List<String> result = new ArrayList <String>(); while (urls.hasMoreElements()) { URL url = urls.nextElement(); Properties properties = PropertiesLoaderUtils.loadProperties(new UrlResource (url)); String factoryClassNames = properties.getProperty(factoryClassName); result.addAll(Arrays.asList(StringUtils.commaDelimitedListToStringArray(factoryClassNames))); } return result; } catch (IOException ex) { throw new IllegalArgumentException ("Unable to load [" + factoryClass.getName() + "] factories from location [" + FACTORIES_RESOURCE_LOCATION + "]" , ex); } }
通过上诉代码中的classLoader.getResources(FACTORIES_RESOURCE_LOCATION)代码,我们可以看出SpringBoot去加载了jar包中META-INF/spring.factories文件,那么这个文件又具有怎样的作用呢?
官方给出的说明是:
使用给定的类加载器从META-INF / spring.factories加载给定类型的工厂实现的完全限定类名。
翻阅了spring-test-4.3.12.RELEASE下的spring.factories文件,其源码如下:
1
2
3
4
5
6
7
8
9
10
11
12
13
14
# Default TestExecutionListeners for the Spring TestContext Framework # org.springframework.test.context.TestExecutionListener = \ org.springframework.test.context.web.ServletTestExecutionListener,\ org.springframework.test.context.support.DirtiesContextBeforeModesTestExecutionListener,\ org.springframework.test.context.support.DependencyInjectionTestExecutionListener,\ org.springframework.test.context.support.DirtiesContextTestExecutionListener,\ org.springframework.test.context.transaction.TransactionalTestExecutionListener,\ org.springframework.test.context.jdbc.SqlScriptsTestExecutionListener # Default ContextCustomizerFactory implementations for the Spring TestContext Framework # org.springframework.test.context.ContextCustomizerFactory = \ org.springframework.test.context.web.socket.MockServerContainerContextCustomizerFactory
不难发现,spring.factories中配置的这些类,主要作用是告诉Spring Boot这个stareter所需要加载的那些xxxAutoConfiguration类,也就是你真正的要自动注册的那些bean或功能。然后,我们实现一个spring.factories指定的类,标上@Configuration注解,一个starter就定义完了。
如果想看一下SpringBoot启动过程中都加载了那些spring.factories文件,可以写这样一个测试类:
1
2
3
4
5
6
7
8
9
10
11
12
13
14
15
16
17
18
19
20
@SpringBootTest public class SpringTest { public static String FACTORIES_RESOURCE_LOCATION = "META-INF/spring.factories" ; @Test public void test1 () { try { EurekaServerApp app = new EurekaServerApp (); Enumeration<URL> urls =app.getClass().getClassLoader().getResources(FACTORIES_RESOURCE_LOCATION); while (urls.hasMoreElements()){ URL url = urls.nextElement(); System.out.println(url.toString()); } } catch (IOException e) { e.printStackTrace(); } } }
其打印结果如下:
1
2
3
4
5
6
7
8
9
10
11
12
13
jar:file:/D:/develop/soft/maven/repo/repositories/org/springframework/cloud/spring-cloud-starter-eureka-server/1.4.0.RELEASE/spring-cloud-starter-eureka-server-1.4.0.RELEASE.jar!/META-INF/spring.factories jar:file:/D:/develop/soft/maven/repo/repositories/org/springframework/cloud/spring-cloud-context/1.3.0.RELEASE/spring-cloud-context-1.3.0.RELEASE.jar!/META-INF/spring.factories jar:file:/D:/develop/soft/maven/repo/repositories/org/springframework/cloud/spring-cloud-commons/1.3.0.RELEASE/spring-cloud-commons-1.3.0.RELEASE.jar!/META-INF/spring.factories jar:file:/D:/develop/soft/maven/repo/repositories/org/springframework/cloud/spring-cloud-netflix-eureka-server/1.4.0.RELEASE/spring-cloud-netflix-eureka-server-1.4.0.RELEASE.jar!/META-INF/spring.factories jar:file:/D:/develop/soft/maven/repo/repositories/org/springframework/boot/spring-boot-actuator/1.5.8.RELEASE/spring-boot-actuator-1.5.8.RELEASE.jar!/META-INF/spring.factories jar:file:/D:/develop/soft/maven/repo/repositories/org/springframework/cloud/spring-cloud-netflix-core/1.4.0.RELEASE/spring-cloud-netflix-core-1.4.0.RELEASE.jar!/META-INF/spring.factories jar:file:/D:/develop/soft/maven/repo/repositories/org/springframework/cloud/spring-cloud-netflix-eureka-client/1.4.0.RELEASE/spring-cloud-netflix-eureka-client-1.4.0.RELEASE.jar!/META-INF/spring.factories jar:file:/D:/develop/soft/maven/repo/repositories/org/springframework/boot/spring-boot-test/1.5.8.RELEASE/spring-boot-test-1.5.8.RELEASE.jar!/META-INF/spring.factories jar:file:/D:/develop/soft/maven/repo/repositories/org/springframework/boot/spring-boot/1.5.8.RELEASE/spring-boot-1.5.8.RELEASE.jar!/META-INF/spring.factories jar:file:/D:/develop/soft/maven/repo/repositories/org/springframework/spring-beans/4.3.12.RELEASE/spring-beans-4.3.12.RELEASE.jar!/META-INF/spring.factories jar:file:/D:/develop/soft/maven/repo/repositories/org/springframework/boot/spring-boot-test-autoconfigure/1.5.8.RELEASE/spring-boot-test-autoconfigure-1.5.8.RELEASE.jar!/META-INF/spring.factories jar:file:/D:/develop/soft/maven/repo/repositories/org/springframework/boot/spring-boot-autoconfigure/1.5.8.RELEASE/spring-boot-autoconfigure-1.5.8.RELEASE.jar!/META-INF/spring.factories jar:file:/D:/develop/soft/maven/repo/repositories/org/springframework/spring-test/4.3.12.RELEASE/spring-test-4.3.12.RELEASE.jar!/META-INF/spring.factories
run 在run方法中,首先定义了一个StopWatch来标记启动时间。
源码如下:
1
2
3
4
5
6
7
8
9
10
11
12
13
14
15
16
17
18
19
20
21
22
23
24
25
26
27
28
29
30
31
32
33
34
35
36
37
38
39
40
41
42
43
44
45
public ConfigurableApplicationContext run (String... args) { StopWatch stopWatch = new StopWatch (); stopWatch.start(); ConfigurableApplicationContext context = null ; FailureAnalyzers analyzers = null ; configureHeadlessProperty(); SpringApplicationRunListeners listeners = getRunListeners(args); listeners.starting(); try { ApplicationArguments applicationArguments = new DefaultApplicationArguments ( args); ConfigurableEnvironment environment = prepareEnvironment(listeners, applicationArguments); Banner printedBanner = printBanner(environment); context = createApplicationContext(); analyzers = new FailureAnalyzers (context); prepareContext(context, environment, listeners, applicationArguments, printedBanner); refreshContext(context); afterRefresh(context, applicationArguments); listeners.finished(context, null ); stopWatch.stop(); if (this .logStartupInfo) { new StartupInfoLogger (this .mainApplicationClass) .logStarted(getApplicationLog(), stopWatch); } return context; } catch (Throwable ex) { handleRunFailure(context, listeners, analyzers, ex); throw new IllegalStateException (ex); } }
查询该方法源码,发现其是将java.awt.headless的值设置为true,查阅资料发现Headless模式是在缺少显示屏、键盘或者鼠标是的系统配置,因为服务器(如提供Web服务的主机)往往可能缺少前述设备,但又需要使用他们提供的功能,生成相应的数据,以提供给客户端(如浏览器所在的配有相关的显示设备)、键盘和鼠标)的主机),所以需要依靠系统的计算能力模拟出这些特性来,即设置其值为true。
getRunListeners 获取SpringApplicationRunListeners,这里的实现方式与上文中的SpringFactoriesLoader.loadFactoryNames类似。
listeners.starting
该方法其实是遍历在最初加入进去的监听器,然后分别执行各监听器对应的staring方法
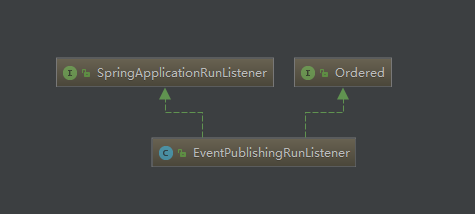
通过下面这个类图,我们不难发现listeners.starting最后执行的是multicastEvent方法。
multicastEvent方法源码如下:
1
2
3
4
5
6
7
8
9
10
11
12
13
14
15
16
17
public void multicastEvent (final ApplicationEvent event, ResolvableType eventType) { ResolvableType type = (eventType != null ? eventType : resolveDefaultEventType(event)); for (final ApplicationListener<?> listener : getApplicationListeners(event, type)) { Executor executor = getTaskExecutor(); if (executor != null ) { executor.execute(new Runnable () { @Override public void run () { invokeListener(listener, event); } }); } else { invokeListener(listener, event); } } }
通过上述源码继续我们依次往下跟读,其方法顺序如下invokeListener=>doInvokeListener=>onApplicationEvent,onApplicationEvent方法则是每个监听器真实是生效的方法。
prepareEnvironment 该方法会根据上文中获取的SpringApplicationRunListeners以及springboot启动时传入的参数来构建启动环境。
prepareEnvironment源码如下:
1
2
3
4
5
6
7
8
9
10
11
12
13
14
private ConfigurableEnvironment prepareEnvironment ( SpringApplicationRunListeners listeners, ApplicationArguments applicationArguments) { ConfigurableEnvironment environment = getOrCreateEnvironment(); configureEnvironment(environment, applicationArguments.getSourceArgs()); listeners.environmentPrepared(environment); if (!this .webEnvironment) { environment = new EnvironmentConverter (getClassLoader()) .convertToStandardEnvironmentIfNecessary(environment); } return environment; }
configureEnvironment
查看该方法不难发现该方法主要是通过configurePropertySources配置Property Sources,通过configureProfiles配置Profiles。
createApplicationContext
创建Spring上下文
这个方法有点的源码很简单,就实例化了一个org.springframework.boot.context.embedded.AnnotationConfigEmbeddedWebApplicationContext。但是如果想要看懂创建上下的实现逻辑,需要去研究spring的源码,这里就不做描述了。
我在idea中查看了一下这个AnnotationConfigEmbeddedWebApplicationContext类的继承关系,现将该图放置在下方。后面有时间再去研究吧。
prepareContext上下文前置处理 源码如下:
1
2
3
4
5
6
7
8
9
10
11
12
13
14
15
16
17
18
19
20
21
22
23
24
25
26
27
28
29
30
31
private void prepareContext (ConfigurableApplicationContext context, ConfigurableEnvironment environment, SpringApplicationRunListeners listeners, ApplicationArguments applicationArguments, Banner printedBanner) { context.setEnvironment(environment); postProcessApplicationContext(context); applyInitializers(context); listeners.contextPrepared(context); if (this .logStartupInfo) { logStartupInfo(context.getParent() == null ); logStartupProfileInfo(context); } context.getBeanFactory().registerSingleton("springApplicationArguments" , applicationArguments); if (printedBanner != null ) { context.getBeanFactory().registerSingleton("springBootBanner" , printedBanner); } Set<Object> sources = getSources(); Assert.notEmpty(sources, "Sources must not be empty" ); load(context, sources.toArray(new Object [sources.size()])); listeners.contextLoaded(context); }
总结 SpringBoot启动主要分为两个步骤:
SpringApplication实例的构建过程:其中最为主要的是通过META-INF/spring.factories加载监听器。
SpringApplication实例run方法的执行过程:其中主要有一个SpringApplicationRunListeners的概念,它作为Spring Boot容器初始化时各阶段事件的中转器,将事件派发给感兴趣的Listeners(在SpringApplication实例的构建过程中得到的)。这些阶段性事件将容器的初始化过程给构造起来,提供了比较强大的可扩展性。