SpringBoot本地化配置
前提概要
相信做过Spring项目的同学应该对下面一行代码比较熟悉:
1
2
3
4
5
6
7
8
9
10
| <bean class="org.springframework.beans.factory.config.PropertyPlaceholderConfigurer">
<property name="systemPropertiesModeName" value="SYSTEM_PROPERTIES_MODE_OVERRIDE"/>
<property name="ignoreResourceNotFound" value="true"/>
<property name="locations">
<list>
<value>classpath:prop/*.properties</value>
<value>file:${XXXX_HOME}/properties/launch.properties</value>
</list>
</property>
</bean>
|
其中,${XXXX_HOME}为环境变量(例如:XXXX_HOME=/usr/local/myjava),从代码可以看出,我们既加载了classpath下的配置文件,又加载了${XXXX_HOME}目录下的properties/launch.properties文件,通过这样的方式,我们可以对项目的配置文件进行集中管理,而不需要每个项目都去配置。
而SpringBoot则移除了上诉的配置方式,而给我们开放了5种加载方式,分别为:
- file:./config/
- file:./
- classpath:/config/
- classpath:/
- spring.config.location
值得注意的是,其中spring.config.location为在启动SpringBoot时,为其指定的配置文件路:
1
| java -jar demo.jar --Dspring.config.location=application.properties
|
当然,如果你在开发项目的时候也可给启动方式添加 VM options参数。
虽然以上方式能解决大部分用户的需求,但我仍然觉得通过环境变量去对项目进行配置的方式更好。
动态管理配置文件
SpringBoot移除了传统的配置方式,并新增了5种新的配置方式,但好在上帝关上一扇门,同时也会为我们打开一扇窗。SpringBoot或许就是为了关照我这类的用户,特意留了一个扩展接口org.springframework.boot.env.EnvironmentPostProcessor ,我们使用这个接口就可以对配置文件进行集中管理。
了解SpringBoot的都知道,它在启动过程中会通过spring.factories 文件去加载启动需要的监听器。此处我将使用spring.factories 与EnvironmentPostProcessor 来构建一个配置文件集中管理的功能。
如果对spring.factories 不了解,可以查阅SpringBoot的启动过程:https://blog.csdn.net/jlh912008548/article/details/81437036
首先,在项目中定义一个类CustomEnvironmentPostProcessor实现EnvironmentPostProcessor 接口,其代码如下:
1
2
3
4
5
6
7
8
9
10
11
12
13
14
15
16
17
18
19
20
21
22
23
24
25
26
27
28
29
30
31
32
33
34
35
36
37
38
39
40
41
42
43
44
45
46
47
48
| import org.slf4j.Logger;
import org.slf4j.LoggerFactory;
import org.springframework.boot.SpringApplication;
import org.springframework.boot.env.EnvironmentPostProcessor;
import org.springframework.core.env.ConfigurableEnvironment;
import org.springframework.core.env.PropertiesPropertySource;
import org.springframework.stereotype.Component;
import pers.jarome.redis.wclient.common.exception.CustomizedRuntimeException;
import pers.jarome.redis.wclient.common.system.constant.SystemConstants;
import pers.jarome.redis.wclient.common.system.util.EnvironmentUtils;
import java.io.FileInputStream;
import java.io.InputStream;
import java.util.Properties;
@Component
public class CustomEnvironmentPostProcessor implements EnvironmentPostProcessor {
private static final Logger LOGGER = LoggerFactory.getLogger(CustomEnvironmentPostProcessor.class);
private static final String CONFIG_PATH = "/config/application.properties";
private static final String SOURCE_NAME = "cus";
@Override
public void postProcessEnvironment(ConfigurableEnvironment configurableEnvironment, SpringApplication springApplication) {
LOGGER.info("Load the configuration file under the environment variable,starting.");
String rcHomeEnv = EnvironmentUtils.getEnv("XXX_HOME");
try(InputStream input = new FileInputStream(rcHomeEnv+CONFIG_PATH)) {
Properties properties = new Properties();
properties.load(input);
PropertiesPropertySource propertySource = new PropertiesPropertySource(SOURCE_NAME, properties);
configurableEnvironment.getPropertySources().addLast(propertySource);
LOGGER.info("Load the configuration file under the environment variable,end.");
} catch (Exception e) {
throw new CustomizedRuntimeException("Failed to load configuration file under environment variable!",e);
}
}
}
|
需要注意的是,此处必须要加上@Component注解,同时所在包必须在SpringBoot的扫描范围内。
这里再将EnvironmentUtils.getEnv代码贴出来:
1
2
3
4
5
6
7
8
9
10
11
12
13
14
15
16
17
18
19
20
21
22
23
24
25
26
27
28
29
30
31
32
33
34
35
| package pers.jarome.redis.wclient.common.system.util;
import org.apache.commons.lang3.StringUtils;
import org.slf4j.Logger;
import org.slf4j.LoggerFactory;
public class EnvironmentUtils {
private static final Logger LOGGER = LoggerFactory.getLogger(EnvironmentUtils.class);
public static String getEnv(String envName){
String rcHomeEnv = System.getenv(envName);
if (StringUtils.isBlank(rcHomeEnv)) {
LOGGER.error("没有找到环境变量:" + envName);
throw new RuntimeException("没有找到环境变量:" + envName);
}
return rcHomeEnv;
}
}
|
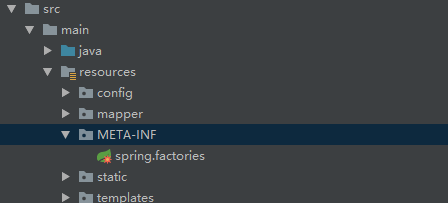
准备好监听器后,我们需要在classpath定义一个META-INF文件夹然后在其下面先建spring.factories文件,在其中指定监听器。
spring.factories内容如下:
1
| org.springframework.boot.env.EnvironmentPostProcessor=pers.jarome.redis.wclient.init.CustomEnvironmentPostProcessor
|
此时,启动SpringBoot项目就行了。