elasticsearch安装教程及异常解决方法
安装elasticsearch之前请确认操作系统中具备jdk1.8环境
本文基于centos6.5环境
安装
首先前往elastic官网下载,下载地址:https://www.elastic.co/downloads/elasticsearch

你可以根据自己操作系统选择对应的安装包。
linux步骤:
1 | #weget https://artifacts.elastic.co/downloads/elasticsearch/elasticsearch-6.6.0.tar.gz |
由于elasticsearch不允许使用root账号启动,如果使用root用户执行脚本,则会报如下错误,所以需要新建一个elasticsearch用户启动程序。
root用户启动异常:
1 | Exception in thread "main" java.nio.file.AccessDeniedException: /usr/local/jarome/elasticsearch-6.6.0/config/jvm.options |
启动异常
1.当操作系统vm.max_map_count配置过低(即:sysctl.conf文件配置过低)时,启动elasticsearch会报如下错误:
1 | max virtual memory areas vm.max_map_count [65530] is too low, increase to at least [262144] |
解决办法:
临时修改(该方法重启系统会失效):
1 | # sysctl -w vm.max_map_count=262144 |
永久修改:
1 | # vim /etc/sysctl.conf |
在该文件中增加如下内容:
1 | # elasticsearch config start |
然后使用sysctl -p命令使修改生效。
2.操作系统安全检车检测配置限制过低(即:limits.conf文件置过低)时,启动elasticsearch会报如下错误:
1 | max file descriptors [4096] for elasticsearch process is too low, increase to at least [65536] |
解决办法:
1 | # vim /etc/security/limits.conf |
追加如下内容:
1 | # elasticsearch config start |
3.启动节点异常
错误日志如下:
1 | maybe these locations are not writable or multiple nodes were started without increasing [node.max_local_storage_nodes] (was [1]) |
解决方法:
增加node.max_local_storage_nodes的值,如:
1 | node.max_local_storage_nodes: 2 |
出现该异常的原因我不是特别清楚,如果你清知道,请留言告诉我一下
配置局域网访问
默认环境下,elasticsearch仅允许localhost访问其服务,如果需要在局域网中访问,需要修改其配置文件elasticsearch.yml中的network.host配置项,例如:
1 | network.host: 您的ip |
当然,你也可以将network.host设置为0.0.0.0
开启跨域访问支持
开启跨域访问支持只需要在配置文件中加入以下配置即可:
1 | #开启跨域访问支持,默认为false |
elasticsearch-head使用
在github上有一个测试elasticsearch的开源工具:elasticsearch-head,github地址为:https://github.com/mobz/elasticsearch-head
使用该工具之前,你应该确保你的操作系统具有npm环境。
启动教程:
1 | git clone git://github.com/mobz/elasticsearch-head.git |
该工具默认访问链接为localhost:9200的elasticsearch服务,当然你也可以在界面上输入其他ip地址,前提是你输入的elasticsearch服务开启了跨域访问支持。
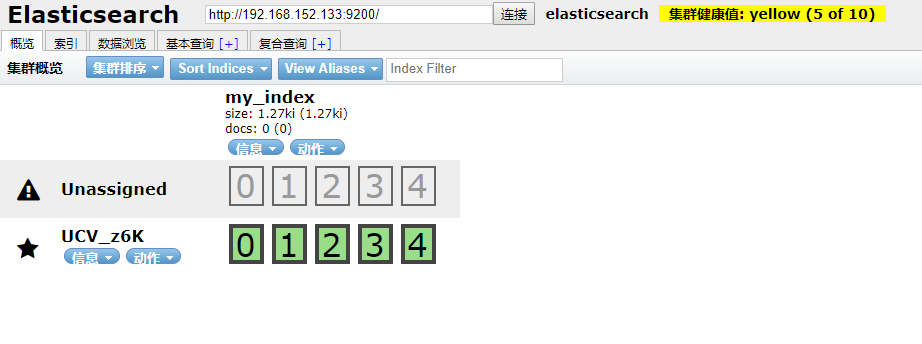
elasticsearch-head截图如下: